 Skip to content
Are you eager to enhance the security of your property with the Arlo Pro 4 Spotlight Camera? Setting up this cutting-edge security device is easier than you might think! In this comprehensive guide, we will walk you through the step-by-step process to install and set up your Arlo Pro 4 Spotlight Camera, ensuring optimal functionality and peace of mind.
Step-by-Step Guide: Arlo Pro 4 Spotlight Camera Setup and Installation
Step 1: Unboxing and Preparing Your Arlo Pro 4 Spotlight Camera: Before we start, make sure you have received all the components included in the package. Typically, the Arlo Pro 4 Spotlight Camera kit contains the camera unit, rechargeable battery, magnetic charging cable, wall mount, and necessary screws.
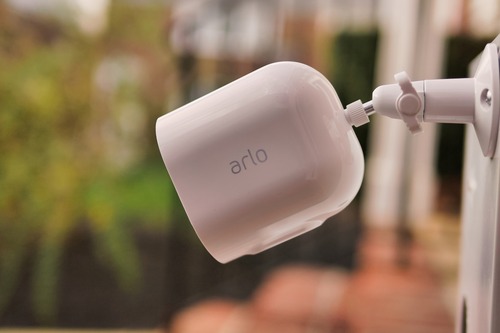
Step 2: Placing the Camera: Select an ideal location for your Arlo Pro 4 Spotlight Camera. It should be strategically positioned to cover the areas you wish to monitor. The camera can be mounted on walls, ceilings, or placed on flat surfaces, depending on your preference.
Step 3: Powering Up the Camera: With the camera in place, it’s time to power it up. Connect the provided magnetic charging cable to the camera’s charging port and the other end to a power source. If you plan to use the camera wirelessly, insert the rechargeable battery and power on the device.
Step 4: Downloading the Arlo App: To continue with the setup process, download the Arlo app from the App Store (for iOS) or Google Play Store (for Android). This app is crucial for configuring and managing your Arlo Pro 4 Spotlight Camera.
Step 5: Adding Your Arlo Pro 4 Spotlight Camera: After logging in, click on the “Add Device” option in the app. Choose “Camera” and scan the QR code on the back of the camera unit. The app will automatically detect your camera and guide you through the setup process.
Step 6: Connecting to Wi-Fi: During setup, the app will prompt you to connect your Arlo Pro 4 Spotlight Camera to your Wi-Fi network. Ensure that your camera is within the range of your Wi-Fi router for a stable connection.
Step 7: Camera Configuration: Once connected to Wi-Fi, you can customize various camera settings, such as motion detection sensitivity, video quality, and notifications. Tailor these settings according to your preferences and security needs.
Step 8: Testing and Finalizing Setup: Congratulations! Your Arlo Pro 4 Spotlight Camera is now set up and ready to go. Before finishing, conduct a quick test to ensure that the camera is capturing footage and sending notifications correctly.
Arlo Pro 4 Spotlight Camera Troubleshooting Guide
The Arlo Pro 4 Spotlight Camera is a cutting-edge security solution that provides advanced features to keep your home or business safe. However, like any electronic device, it may encounter occasional issues. In this comprehensive troubleshooting guide, we will address common problems that Arlo Pro 4 users may encounter and offer step-by-step solutions to resolve them efficiently.
- Ensure Proper Power Supply: Issue: The Arlo Pro 4 camera is not turning on or not responding. Solution:
a. Check if the camera is properly connected to a power source.
b. Verify that the power adapter is functional, and the cable is not damaged.
c. Try using a different power outlet to eliminate the possibility of an outlet issue. - Connection and Syncing Problems: Issue: The camera is unable to connect to the Arlo base station or sync with the Arlo app. Solution:
a. Ensure that the camera is within the range of the base station and that there are no physical obstructions affecting the signal.
b. Restart the camera and the base station.
c. Check for any firmware updates for the camera and the base station, and update them if available.
d. Verify that you are using the correct login credentials on the Arlo app. - Poor Video Quality: Issue: The camera’s video feed appears blurry or distorted. Solution:
a. Clean the camera lens using a soft, lint-free cloth to remove any dirt or smudges.
b. Check the camera’s resolution settings in the Arlo app and ensure it is set to the highest possible quality.
c. If the camera uses batteries, ensure they are fully charged or replace them with new ones. - Night Vision Issues:
Issue: The night vision feature is not working correctly or producing low-quality images. Solution:
a. Check the camera’s infrared lights and ensure they are not blocked by any objects.
b. Adjust the night vision settings in the Arlo app to improve image quality.
c. If the issue persists, try resetting the camera to its factory settings and reconfigure it.
Looking to set up and install your Arlo Pro 4 Spotlight Cameras? Look no further! At SetupCameras.com, we provide comprehensive step-by-step guides and expert support for a seamless setup process. Ensure maximum security and peace of mind with our easy-to-follow instructions. Contact SetupCamera.com for reliable technical support. Get started today with Arlo Pro 4 Spotlight Camera installation assistance from the trusted experts at SetupCameras.com.
