 Skip to content
In this step-by-step guide, we will walk you through the easy process of setting up and installing the Arlo Video Doorbell Camera. Arlo is a renowned brand that offers cutting-edge security solutions, and their Video Doorbell Camera is no exception. With its advanced features and user-friendly design, protecting your home has never been easier. Follow these instructions carefully to ensure a seamless installation and get ready to enjoy the peace of mind that comes with enhanced home security.
A Comprehensive Guide to Setting up and Installing the Arlo Video Doorbell Camera
Step 1: Unboxing and Preparation: Before you start the installation process, make sure you have all the components from the Arlo Video Doorbell Camera package. This typically includes the doorbell unit, mounting plate, wire extensions, screws, and a quick-start guide. Double-check that everything is present and undamaged.
Step 2: Check Compatibility and Requirements: Ensure your home meets the necessary requirements for installing the Arlo Video Doorbell Camera. You will need a stable Wi-Fi connection with at least 2 Mbps upload speed for optimal performance. Additionally, make sure your current doorbell setup operates at 16-24 volts AC and is compatible with Arlo’s specifications. If you’re uncertain about the voltage, consult a professional electrician.
Step 3: Remove Existing Doorbell and Wiring: If you have an existing doorbell, carefully remove it from its mount and disconnect the wiring. Keep the wires accessible, as they will be used in the setup process for the Arlo Video Doorbell Camera.
Step 4: Download the Arlo App: To configure and monitor your Video Doorbell Camera, download the Arlo app from the App Store (for iOS) or Google Play Store (for Android). Create an Arlo account if you don’t already have one.
Step 5: Start the Setup Process: Open the Arlo app and follow the on-screen instructions to add a new device. Select “Video Doorbell” from the list of available Arlo devices. The app will guide you through the setup process, including connecting to your Wi-Fi network and syncing the doorbell with the app.
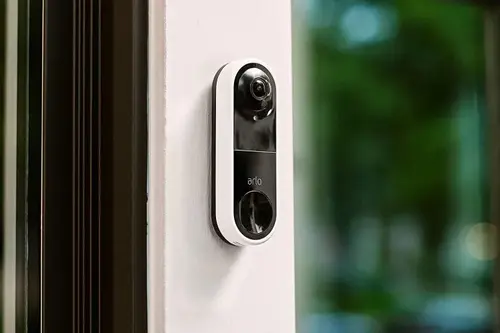
Step 6: Install the Arlo Video Doorbell Camera: Using the provided mounting plate and screws, securely attach the Arlo Video Doorbell Camera to the designated spot near your front door. If required, use the wire extensions to connect the doorbell to your existing wiring. Ensure the device is level and firmly fixed in place.
Step 7: Test the Doorbell and Adjust Settings: After installation, test the doorbell to ensure it is functioning correctly. You can customize various settings, such as motion detection sensitivity, notification preferences, and doorbell chime options, within the Arlo app to suit your preferences.
Arlo Video Doorbell Camera Troubleshooting Guide
1. No Power or Device Won’t Turn On: If your Arlo Video Doorbell Camera doesn’t power on, follow these steps:
a. Check Power Source: Verify that the doorbell is correctly connected to a power source. Ensure the wires are securely attached to the chime kit or transformer.
b. Reset: Try resetting the device by pressing and holding the reset button for 10 seconds, and then attempt to power it on again.
2. Poor Video Quality: To address issues with video quality, try the following:
a. Wi-Fi Signal Strength: Check your Wi-Fi router’s signal strength near the doorbell’s location. Weak signals can cause video lag and pixelation. Consider using a Wi-Fi extender or relocating the router.
b Camera Lens Cleaning: Gently clean the camera lens with a microfiber cloth to remove any dust or smudges that may be affecting video clarity.
c. Motion Settings: Adjust the motion detection settings on the Arlo app to find the optimal balance between sensitivity and false alerts.
3. Delayed or No Notifications: If you are not receiving notifications or experiencing delays, follow these steps:
a. App Notifications: Ensure that the Arlo app has the necessary permissions to send notifications. Check your phone’s settings to allow Arlo notifications.
b. Motion Detection Zone: Verify that the motion detection zone includes the area you want to monitor. Adjust the settings to capture the desired region accurately.
c. Firmware Updates: Keep your Arlo Video Doorbell Camera firmware up-to-date. Regularly check for firmware updates through the Arlo app and install them if available.
4. Unresponsive Doorbell Button: If the doorbell button doesn’t respond, consider the following:
a. Check Wiring: Inspect the wiring connections and make sure they are secure. Loose connections can cause button unresponsiveness.
b. Button Cleaning: Clean the doorbell button gently to remove dirt or debris that might be affecting its functionality.
c. Power Cycle: Power cycle the doorbell by disconnecting it from the power source for a few seconds, then reconnect it to see if the button becomes responsive.
5. Audio Issues: To troubleshoot audio problems, try these steps:
a. Microphone Check: Ensure that the microphone is not obstructed by dust or debris. Clean it carefully using compressed air if needed.
b. Two-Way Audio Settings: Verify that two-way audio is enabled in the Arlo app settings.
c. Quiet Area: If there’s excessive background noise, consider adjusting the camera’s location to reduce ambient sounds.
Looking to set up your Arlo Video Doorbell Camera seamlessly and effortlessly? Experience smooth and trouble-free camera setup with SetupCameras.com dedicated technical support. Our expert team is dedicated to providing top-notch support and guidance for your Arlo Video Doorbell Camera setup and installation needs. Follow our step-by-step instructions to ensure a smooth and hassle-free installation process. Discover the convenience of a smart video doorbell that enhances your home security. Trust SetupCameras.com for reliable assistance and unlock the full potential of your Arlo Video Doorbell Camera today!
