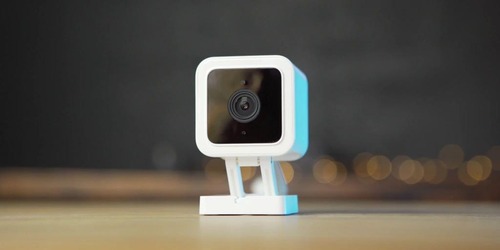
Welcome to the ultimate guide on setting up and installing the Wyze Cam v3, a cutting-edge home security camera designed to provide you with peace of mind. In this comprehensive guide, brought to you by SetupCamera, we’ll walk you through the step-by-step process of getting your Wyze Cam v3 up and running in no time. Whether you’re a tech-savvy enthusiast or a beginner, our easy-to-follow instructions will ensure a smooth setup experience. Let’s dive in!

Wyze Cam v3 Setup and Installation Guide: Step-by-Step Instructions
Section 1: Unboxing Your Wyze Cam v3 When your Wyze Cam v3 arrives, unbox it carefully and ensure that all the components are included: the Wyze Cam v3 unit, a USB cable, a power adapter, a magnetic mounting base, and any other accessories. Checking for any shipping damages is crucial to avoid potential issues during installation.
Section 2: Setting Up the Wyze Cam v3
- Choose the Ideal Location: Select a strategic location for your Wyze Cam v3. Ensure it has a clear view of the area you want to monitor, such as the front door, backyard, or living room. Keep in mind that the Wyze Cam v3 is designed for both indoor and outdoor use.
- Powering Your Wyze Cam v3: Connect the USB cable to the Wyze Cam v3’s power input and the power adapter. Plug the power adapter into a nearby electrical outlet. Double-check the connection to avoid any power-related issues.
- Download the Wyze App: Search for the “Wyze” app on the App Store (for iOS users) or Google Play Store (for Android users). Download and install the app on your smartphone or tablet.
- Create a Wyze Account: Open the Wyze app and create a new account if you don’t have one already. This account will be used to manage your Wyze Cam v3 and access its features remotely.
- Adding Your Wyze Cam v3: Follow the app’s on-screen instructions to add your Wyze Cam v3 to your account. This typically involves scanning a QR code located on the camera or its packaging. Make sure your smartphone is connected to the same Wi-Fi network as your Wyze Cam v3 during this process.
- Connecting to Wi-Fi: The Wyze app will guide you through connecting your Wyze Cam v3 to your Wi-Fi network. Input your Wi-Fi credentials when prompted, and ensure you have a stable internet connection for optimal performance.
Section 3: Fine-Tuning Your Wyze Cam v3
- Camera Orientation: Adjust the camera’s position using the magnetic mounting base to get the desired viewing angle. Tilt or rotate the Wyze Cam v3 until you achieve the best coverage of your target area.
- Night Vision and Image Quality: Access the camera settings in the Wyze app to adjust night vision settings and image quality. Higher image quality may consume more bandwidth, so find the right balance based on your needs.
- Enable Motion Detection and Notifications: Set up motion detection in the app to receive alerts whenever the Wyze Cam v3 detects movement. Adjust sensitivity levels to prevent false alarms.
- Two-Way Audio: Test the two-way audio feature to ensure you can communicate through the camera’s built-in speaker and microphone.
You’ve successfully set up and installed your Wyze Cam v3 using our step-by-step guide. Now, you can enjoy enhanced security and peace of mind knowing that your property is monitored day and night. If you have any further questions or need assistance, remember to refer back to this guide Visit the Wyze website for additional support. Happy monitoring!
