 Skip to content
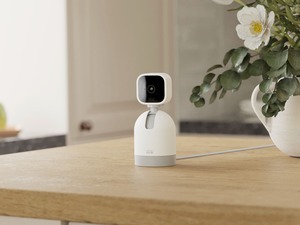
In the fast-paced world of today, home security has become an essential aspect of our lives. Technological advancements have led to the creation of innovative security solutions, and one such product is the Blink Pan-Tilt Mount. This ingenious device allows you to enhance your security camera’s field of view by offering remote control over its orientation. In this article, we will provide you with a detailed step-by-step guide on how to install the Blink Pan-Tilt Mount and set up your camera for optimal security coverage.
Before You Begin: Gather Your Materials
Before you start the installation process, make sure you have all the necessary materials ready. Here’s what you’ll need:
- Blink Pan-Tilt Mount Kit: Ensure you have the complete kit with all its components.
- Blink Camera: The security camera that you want to mount on the pan-tilt mount.
- Power Source: Make sure you have a power outlet or an appropriate power source nearby for the camera.
- Wi-Fi Connection: Ensure your Wi-Fi network is up and running to connect the camera to the Blink app.
- Smartphone or Tablet: You will need a device with the Blink app installed to complete the setup.
Step-by-Step Installation Guide
Follow these steps carefully to successfully install the Blink Pan-Tilt Mount and set up your security camera:
Step 1: Unboxing and Inspection
Begin by unboxing the Blink Pan-Tilt Mount kit. Carefully inspect all the components to ensure nothing is damaged or missing. The kit should typically include the pan-tilt mount unit, mounting screws, a USB cable, and an adapter.
Step 2: Choosing the Right Location
Select an optimal location to mount the pan-tilt unit. This spot should provide a clear view of the area you want to monitor. It’s also essential to ensure that the chosen location has a stable surface for mounting.
Step 3: Mounting the Pan-Tilt Unit
Using the included screws, mount the pan-tilt unit securely on the chosen surface. If you’re mounting it on a wall, make sure the unit is level. If it’s on a ceiling, ensure it’s firmly attached to avoid any accidents.
Step 4: Attaching the Camera
Connect your Blink camera to the pan-tilt mount. Depending on the specific model, this may involve sliding the camera onto a mount or attaching it using a compatible bracket. Ensure the camera is secure and properly aligned to achieve the desired viewing angle.
Step 5: Powering the Camera
Connect the Blink camera to a power source using the provided USB cable and adapter. Make sure the camera is receiving power before proceeding.
Step 6: Connecting to Wi-Fi
Turn on your smartphone or tablet and open the Blink app. Follow the app’s instructions to add a new device. This usually involves scanning a QR code on the camera or entering a unique device code. Connect the camera to your Wi-Fi network through the app.
Step 7: Testing and Finalizing
After adjusting the camera’s orientation, test its movement through the app to ensure it covers the intended areas. Check the camera’s view on your smartphone or tablet to make sure it meets your security needs. Make any necessary fine-tuning adjustments.
Conclusion
The Blink Pan-Tilt Mount is a valuable addition to your security camera system, offering enhanced coverage and control. Its ease of installation, remote accessibility, and compatibility with various camera models make it a top choice for those looking to bolster their security efforts. Remember, for any inquiries or assistance with installation or setup, SetupCamera.com is here to help. Your safety and peace of mind are our top priorities.
