 Skip to content
In an era where safety and security are paramount, the installation of reliable surveillance systems has become an essential aspect of modern living. Nest security cameras, renowned for their advanced features and user-friendly interface, offer peace of mind by keeping a vigilant eye on your home. In this guide, we’ll walk you through the step-by-step process of installing your Nest security camera, ensuring a seamless setup that enhances your home protection. For expert guidance and support, don’t hesitate to reach out to SetupCamera.com.
Choosing the Right Location:
Before diving into the installation process, it’s crucial to choose an optimal location for your Nest security camera. Consider areas that provide a clear view of the desired surveillance area while minimizing obstructions and false alarms. Keep in mind factors such as Wi-Fi signal strength and power outlet proximity.
Gathering Equipment:
Ensure you have all the necessary equipment ready for the installation:
- Nest security camera
- Mounting hardware
- Screwdriver
- Power adapter and cable
- Wi-Fi network details
Installation Steps:
- Download the Nest App: Begin by downloading the Nest app on your smartphone. This app will be your central hub for managing and configuring your security camera.
- Create or Sign In to Your Nest Account: If you’re new to Nest, create an account. If you already have one, simply log in to proceed.
- Add a New Device: In the app, select “Add a Product” and follow the prompts to add your Nest security camera.
- Scan the QR Code: Scan the QR code on your camera with your smartphone to link it to your Nest account.
- Choose Installation Type: Select the type of installation – indoor or outdoor – and follow the on-screen instructions.
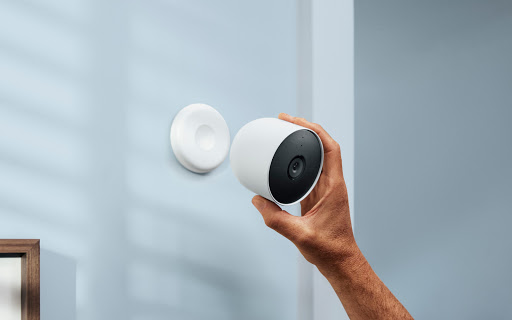
- Mount the Camera: Use the provided mounting hardware to securely attach the camera to the chosen location. Ensure it’s properly aligned for the desired field of view.
- Connect to Wi-Fi: The app will guide you through connecting your camera to your home Wi-Fi network. Enter the network details as prompted.
- Configure Settings: Customize your camera settings, such as motion detection sensitivity, alerts, and video quality, to suit your preferences.
Contact SetupCamera.com for Expert Assistance:
If at any point during the installation process you encounter difficulties or have questions, the professionals at SetupCamera.com are just a call away. Their expertise ensures that your Nest security camera is installed correctly and optimally configured for reliable home surveillance.
Conclusion:
Installing a Nest security camera is a proactive step toward enhancing the safety of your home. By carefully selecting the installation location, following the steps outlined in this guide, and seeking expert assistance when needed, you can enjoy the benefits of advanced security technology with confidence and ease. Contact SetupCamera.com for a smooth and hassle-free installation experience, enabling you to focus on what truly matters: the security and well-being of your loved ones.
