 Skip to content
Home security has taken a giant leap forward with the advent of smart cameras, and the Nest Cam IQ Outdoor is at the forefront of this technological revolution. Offering high-quality video recording, intelligent alerts, and robust weather resistance, the Nest Cam IQ Outdoor is an essential addition to any modern home. In this guide, we’ll walk you through the step-by-step setup and installation process, ensuring you can enjoy peace of mind and enhanced security for your property.
Step 1: Gather Your Equipment
Before you begin, ensure you have all the necessary equipment:
- Nest Cam IQ Outdoor
- Mounting bracket and screws
- Drill and appropriate drill bits
- Screwdriver
- A Wi-Fi-connected smartphone or tablet with the Nest app installed
Step 2: Choose the Installation Location
Selecting the right location for your Nest Cam IQ Outdoor is crucial. Consider the following factors:
- Viewing Angle: The camera’s field of view should cover the area you want to monitor. The Nest Cam IQ Outdoor has a 130° diagonal field of view.
- Height: Mount the camera at a height that prevents easy tampering while capturing clear visuals.
- Power Outlet and Wi-Fi Signal: Ensure the camera is within reach of a power outlet and receives a strong Wi-Fi signal for seamless connectivity.
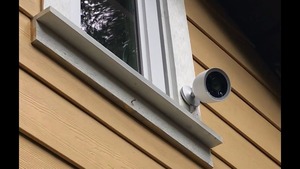
Step 3: Install the Camera
- Mount the Bracket: Use the mounting bracket as a template to mark the drill holes on the chosen surface. Drill the holes and secure the bracket using the provided screws.
- Attach the Camera: Gently slide the Nest Cam IQ Outdoor onto the bracket until it clicks into place. The magnetic mount ensures a secure attachment.
- Connect the Cable: Plug the camera’s cable into the port at the back. Make sure the cable is discreetly routed and protected against weather elements.
Step 4: Set Up Using the Nest App
- Download the Nest App: Install the Nest app on your smartphone or tablet from the App Store or Google Play Store.
- Create or Log In to Your Account: If you’re new to Nest, follow the prompts to create an account. If you already have an account, log in.
- Add a Product: Tap the “+” icon in the app and select “Add Product.”
- Scan the QR Code: Scan the QR code on the camera using your smartphone’s camera. This will help the app identify your camera.
- Connect to Wi-Fi: Follow the on-screen instructions to connect the camera to your Wi-Fi network.
- Customize Settings: Configure settings such as camera name, alerts, and notifications according to your preferences.
Step 5: Position and Test
With the camera set up, position it to capture the desired area. Use the app’s live view to ensure the camera covers the intended area and provides a clear view.
Conclusion
The Nest Cam IQ Outdoor is a robust and intelligent security solution that provides homeowners with advanced monitoring capabilities. By following these setup and installation steps, you can ensure your camera is properly positioned and connected for optimal performance. With its high-quality video, intelligent alerts, and weather-resistant design, the Nest Cam IQ Outdoor offers enhanced security and peace of mind for your home. For any further assistance or troubleshooting, you can always refer to the official Nest support resources or visit SetupCamera.com for expert guidance.
