 Skip to content
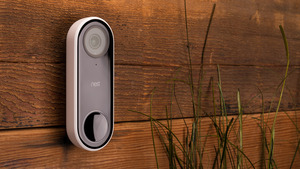
In today’s world of smart technology, home security has taken a giant leap forward with devices like the Nest Hello Video Doorbell. This innovative device allows you to see, hear, and speak to visitors at your doorstep from anywhere using your smartphone. If you’ve just acquired a Nest Hello Video Doorbell and are eager to set it up, you’re in luck. This article will walk you through the installation process step by step.
Step 1: Gather Your Tools
Before you start, it’s a good idea to gather the necessary tools and materials. Here’s what you’ll need:
- Nest Hello Video Doorbell: Obviously, you’ll need the doorbell itself.
- Screwdriver: You’ll likely need a screwdriver for mounting the doorbell.
- Drill and Drill Bits: If your doorbell requires drilling for installation.
- Chime Connector (included): This is required if you have a digital chime.
- Wire Labels (included): These will help you label the existing wires for easy installation.
- Power Kit (included): Needed to ensure a steady power supply.
Step 2: Turn Off Power
Safety comes first. Locate your home’s circuit breaker and turn off the power supply to your existing doorbell system. This will prevent any electrical mishaps during installation.
Step 3: Attach the Chime Connector
If your home has a digital chime, you’ll need to attach the Chime Connector to the wires connected to your chime. Follow the instructions provided in the Nest Hello package to correctly connect the wires.
Step 4: Mount the Bracket
Using the provided mounting bracket, position it where you want the doorbell to be installed. Ensure it’s level and mark the positions for drilling holes if necessary. Use the appropriate drill bit to create holes for mounting.
Step 5: Connect Wires
Gently thread the labeled wires through the bracket and connect them to the corresponding terminals on the back of the Nest Hello doorbell. Tighten the screws to secure the wires in place.
Step 6: Attach the Doorbell
Slide the Nest Hello Video Doorbell onto the mounting bracket until it clicks into place. Use the provided security screw to secure the doorbell to the bracket, deterring theft.
Step 7: Install the Power Kit
If your doorbell doesn’t receive enough power from the existing wiring, you’ll need to install the Power Kit. Follow the instructions carefully to connect it to the wires inside your doorbell chime.
Step 8: Turn the Power On
Once you’re sure all connections are secure, head back to your circuit breaker and restore power to your doorbell system.
Step 9: Set Up the Nest App
Download the Nest app onto your smartphone or tablet. Follow the on-screen instructions to create a Nest account or log in if you already have one. Add your Nest Hello Video Doorbell to your account by scanning the QR code on the back of the doorbell or entering the code manually.
Step 10: Configure Doorbell Settings
Use the app to customize your doorbell settings. You can adjust motion sensitivity, set up alerts, and personalize notifications according to your preferences.
Congratulations! You’ve successfully set up and installed your Nest Hello Video Doorbell. Now you can enjoy the convenience and security of monitoring your doorstep from anywhere in the world.
At Setup Camera Tech Support, get prompt help with camera setup and technical issues. Enjoy your enhanced home security and seamless visitor interactions!
