 Skip to content
In the rapidly evolving world of technology, home security has taken a giant leap forward with the advent of smart cameras. Among the leading players in this space is Netgear Arlo, a brand known for its cutting-edge wireless security cameras. Setting up and installing these cameras might seem like a daunting task, but with the right guidance, it becomes a seamless process. In this article, we’ll walk you through the Netgear Arlo camera setup and installation steps, ensuring your home remains well-protected.
For detailed instructions and expert assistance, you can always reach out to Setup Camera, a reliable resource dedicated to guiding users through the setup process of various smart cameras, including Netgear Arlo.
Step 1: Unboxing and Reviewing Contents
Upon receiving your Netgear Arlo camera package, begin by carefully unboxing and reviewing the contents. You should find the camera(s), mounting hardware, batteries, power adapter (if applicable), and an instruction manual.
Step 2: Preparing the Cameras
- Powering Up: If your Arlo cameras are battery-powered, insert the provided batteries. For wired models, connect the camera to a power outlet using the supplied adapter.
- Syncing the Cameras: To sync the cameras with your Arlo base station, press the sync button on the camera and follow the instructions on the base station. This step establishes a secure connection between the camera and the base station.
Step 3: Setting Up the Base Station
- Connecting to the Network: Connect the base station to your router using an Ethernet cable. Power on the base station and wait for the LED lights to stabilize.
- Creating an Arlo Account: If you don’t already have one, create an Arlo account through the Arlo app or website. This account is essential for accessing your camera feeds remotely.
- Adding the Base Station: Log in to your Arlo account and follow the prompts to add the base station to your account. This step is crucial for managing and controlling your cameras.
Step 4: Installing the Cameras
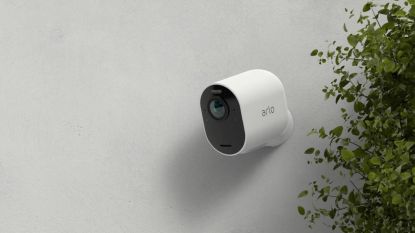
- Camera Placement: Determine the optimal locations for your cameras. They should cover entry points and vulnerable areas. The cameras can be mounted indoors or outdoors.
- Mounting Process: Use the provided mounting hardware to install the cameras. This often involves attaching a magnetic mount to the desired surface and then securing the camera onto the mount. Adjust the camera’s angle to get the best view.
Step 5: Adjusting Camera Settings
- Accessing Camera Settings: Using the Arlo app or website, access the settings for each camera. You can customize preferences such as motion sensitivity, video quality, and notification preferences.
- Scheduling and Modes: Set up modes and schedules to determine when the cameras should activate, record, and send alerts. This allows for tailored surveillance based on your routine.
Step 6: Testing the System
- Live Viewing: Ensure that the cameras are capturing the desired areas and that the feed is accessible through the Arlo app or website.
- Motion Testing: Test the motion detection capabilities of the cameras by walking in front of them and checking if you receive notifications.
Step 7: Remote Access and Monitoring
- Mobile Access: Download the Arlo app on your smartphone to access live camera feeds, receive alerts, and manage settings remotely.
- Web Access: If you prefer using a computer, you can access your Arlo account through a web browser to view camera feeds and manage settings.
Expert Assistance from Setup Camera
For a hassle-free setup experience, consider reaching out to Setup Camera. Their experts are well-versed in the intricacies of Netgear Arlo camera setup and installation. Whether you’re a tech novice or simply want the process to be smooth, their guidance can make all the difference.
